The recent changes to VMware by Broadcom have left many of us pondering alternatives for our home labs. As a former user of the free ESXi, I found myself in a predicament when that option started disappearing.
Enter oVirt, an open-source project that serves as the upstream counterpart to Red Hat Virtualization (RHV). As someone familiar with Red Hat products at work, I was intrigued by oVirt’s potential. Interestingly, Red Hat itself is planning to exit the RHV space, which seems like a bold move given the industry landscape. However, oVirt remains open-source and, hopefully, resilient. Oracle also utilizes oVirt for its OLVM product.
The oVirt documentation is a mixed bag—sometimes comprehensive, sometimes lacking. When you encounter issues, consider raising a GitHub defect. As part of my contribution to the community, I’ll do my best to address them.
So, how does one dive into the world of oVirt?
- Hypervisor-Only Node: Like ESXi, oVirt allows you to create a hypervisor-only node. This minimalist setup is familiar and straightforward.
- Self-Hosted ovirt-engine: Think of this as the vCenter equivalent in the oVirt ecosystem. It manages your oVirt environment. While the documentation can be verbose and occasionally outdated, the following steps should help you get started:
- Choose Your Path: Opt for the oVirt Node and self-hosted ovirt-engine setup. It’s my personal favorite and promises an engaging experience.
- Storage Connection: I’ll be connecting my oVirt Hypervisors to my QNAP NAS via NFS. Simplicity wins in my home lab.
Remember, oVirt is an adventure—a chance to explore beyond the familiar VMware landscape. Let’s embark on this journey together!
Getting the media
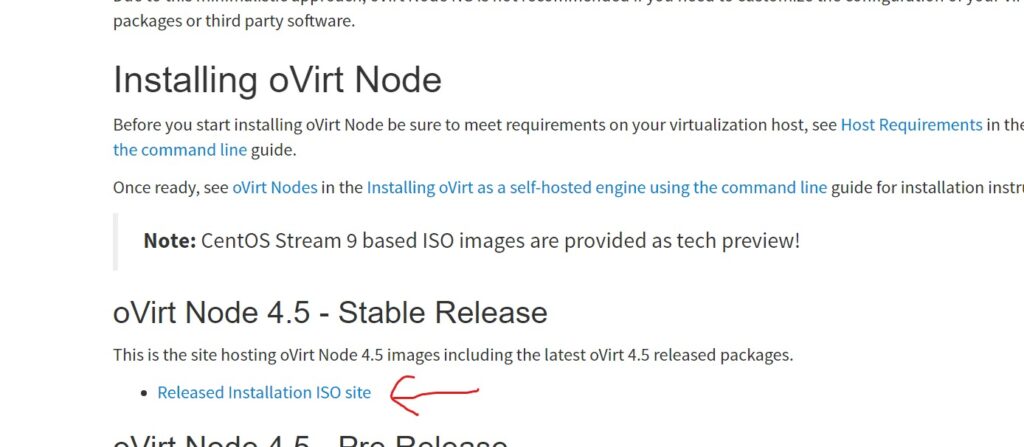
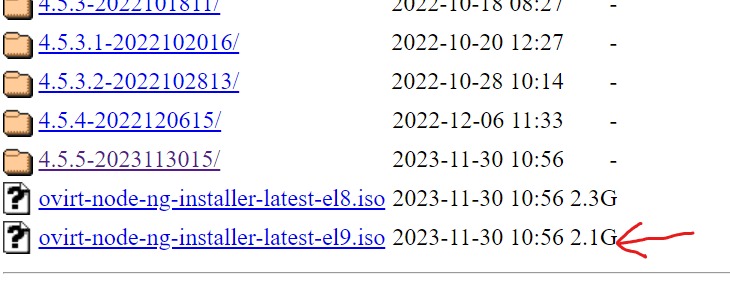
Head off to oVirt Node | oVirt to download the ‘hypervisor-only’ ISO. I chose from the 4.5.5 released ISO’s and I picked the CentOS 9 version.
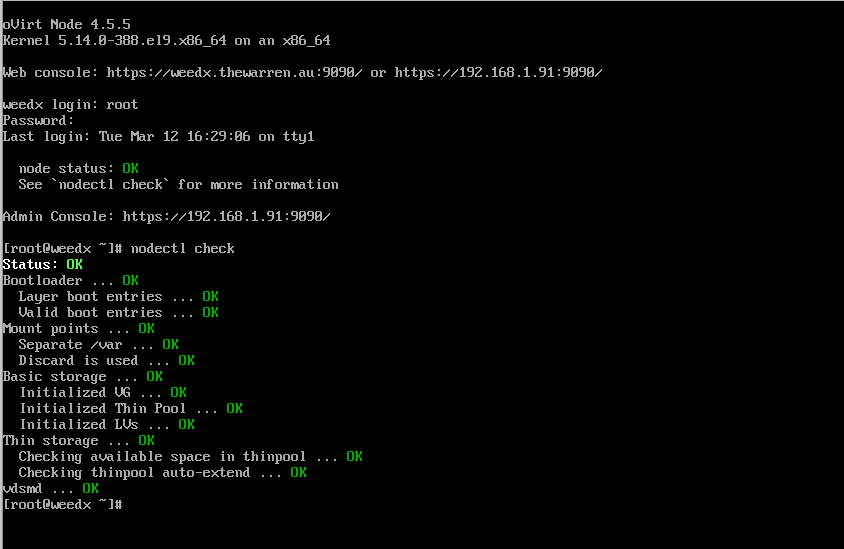
Install the Hypervisor
Fortunately, the hypervisor install is very simple, it’s just another anaconda-based install ISO. You can find detailed instructions at this link Installing oVirt as a self-hosted engine using the command line | oVirt and when you’re done, you can logon and you should see the following.
Deploying the self-hosted engine
So, how do you deploy the self-hosted ovirt-engine – that is, the ovirt engine appliance hosted on the oVirt node you just built. It’s a simple command, but it will take a while to execute. It downloads / installs an RPM that contains the appliance OVA. It powers it on, patches it and then installs the ovirt-engine into the new virtual machine.
The ovirt-engine will then perform extra configuration of your oVirt node and as part of the last step it will copy the ovirt-engine VM to your shared storage. You’ll see the important parts in the process detailed below.
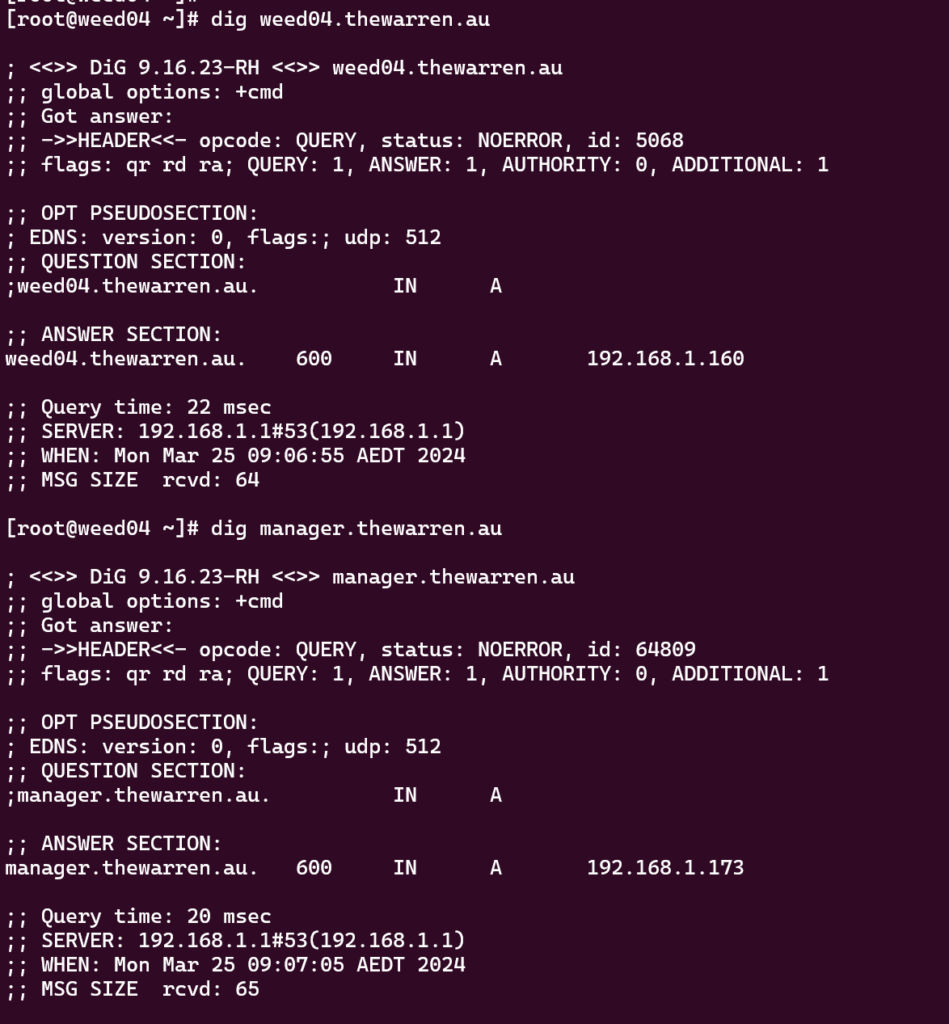
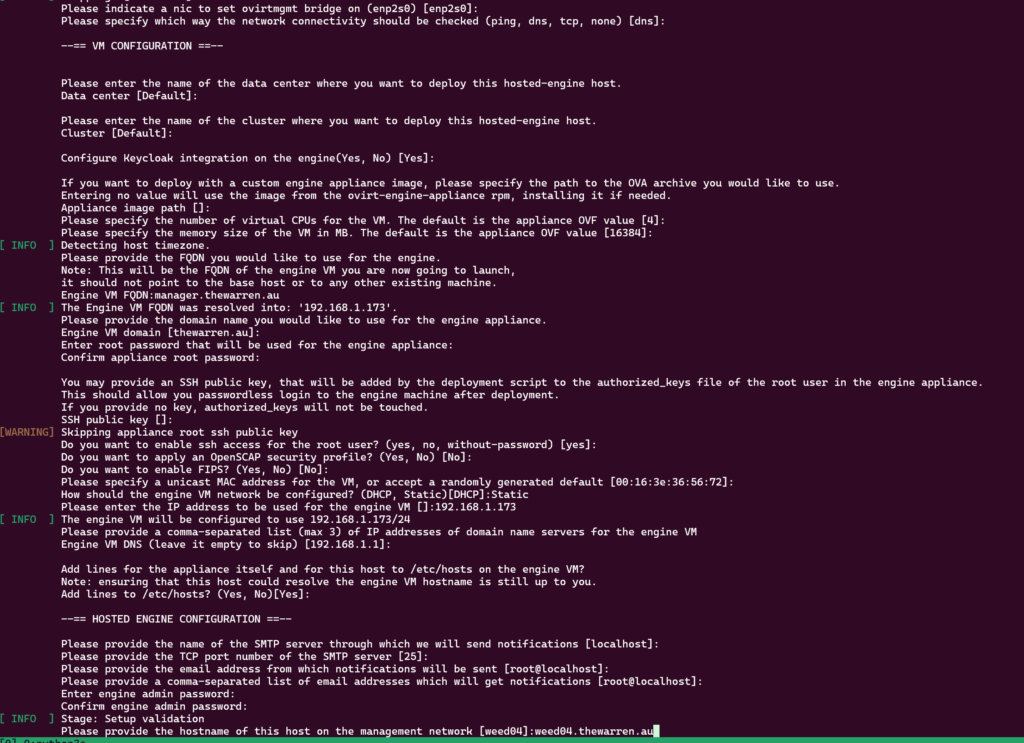
Firstly, before you start, make sure the oVirt Node is defined in your DNS and make sure the ovirt manager is also in your DNS.
Start tmux, and then run the installer.

There are lots of questions to answer, but they’re mostly self-explanatory. Note: The –4 option passed to the command sets up IPv4 only.
Here is how I responded to the questions, note, both the VM name and the node name must resolve in the DNS that you nominate.
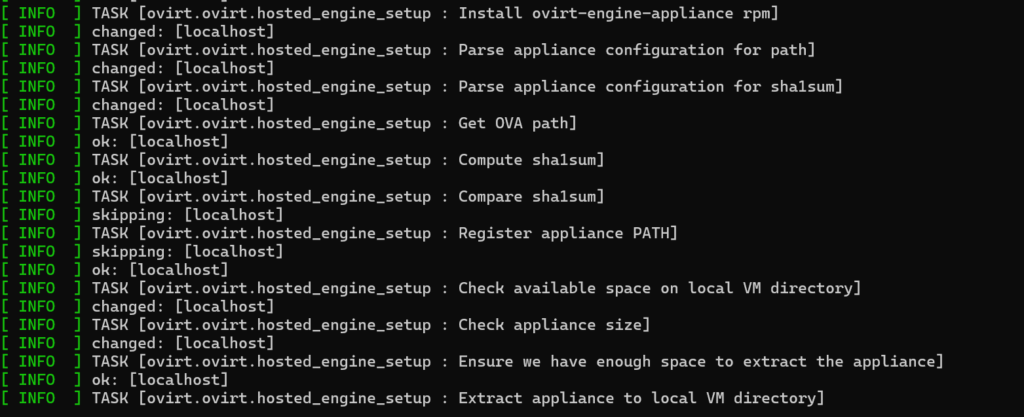
The setup script has just about everything it needs at this stage. I’ve called out some step that will take a while to perform.
This step takes a while as the RPM contains the base OVA for the ovirt-engine appliance, it’s a big RPM.

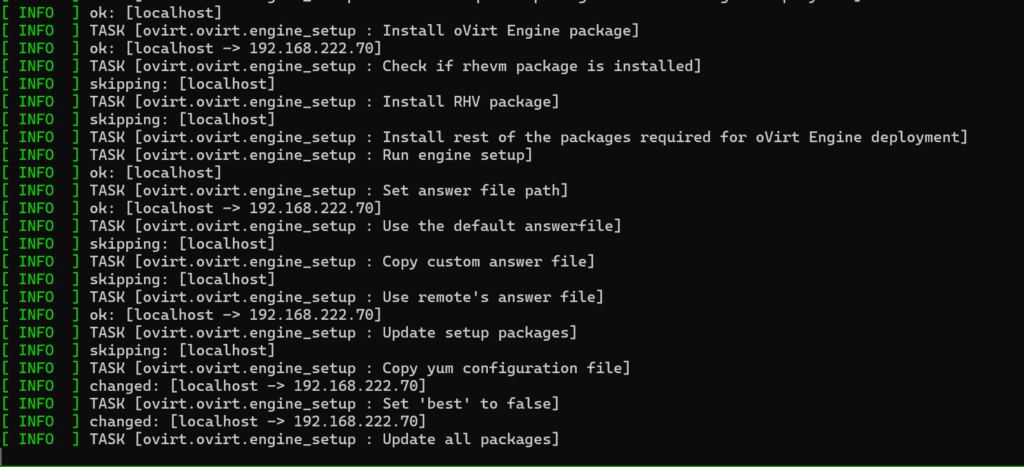
and this takes even longer
Once the OVA is finally available, it gets deployed and powered on. Once deployed, the tool will install the ovirt-engine on the new VM and apply all the patches. This will take another long time.
Then the oVirt engine gets installed and configured.
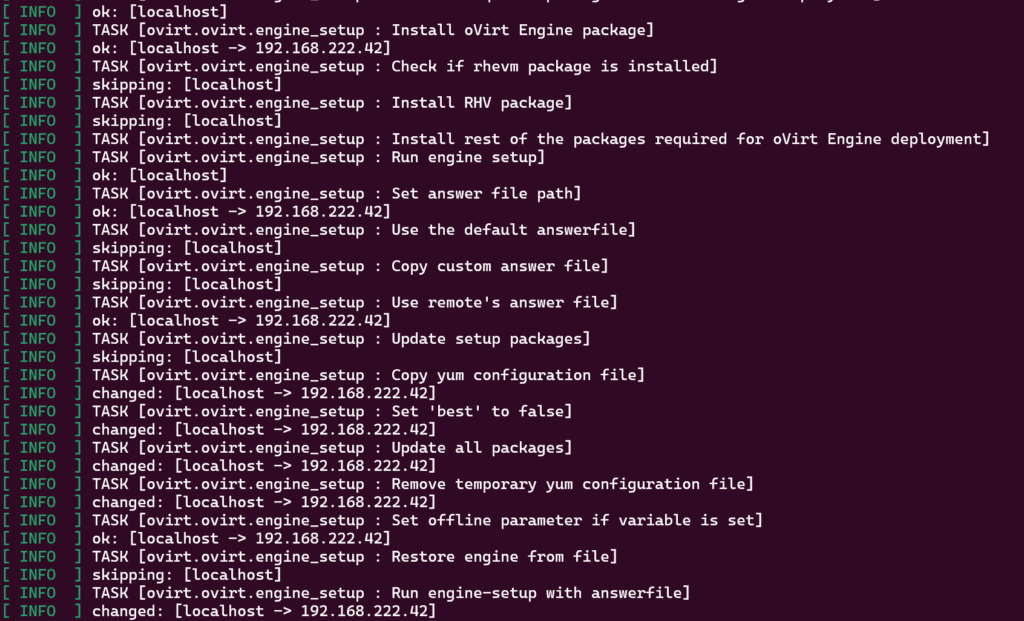
Note: Once the oVirt Engine starts it will reach back into your oVirt node and perform a range of extra configuration of the oVirt node.
The installer will then prompt you for shared storage options to add into the oVirt node. This is required as the installer will move the oVirt Engine VM from the oVirt node local disk to the shared storage for HA purposes.
In my case I chose NFS.

At this point, the installer asks the oVirt Engine to create the new storage domain. The oVirt Engine will talk to VDSM on the oVirt node to configure the shared storage.

Once the storage domain has been created, the installer will create the final oVirt Engine VM and copy the disk image from the local hard drive to the shared storage domain. You have an option to increase the disk size of the appliance. I left it at the default.

This will also take a while depending on your infrastructure.

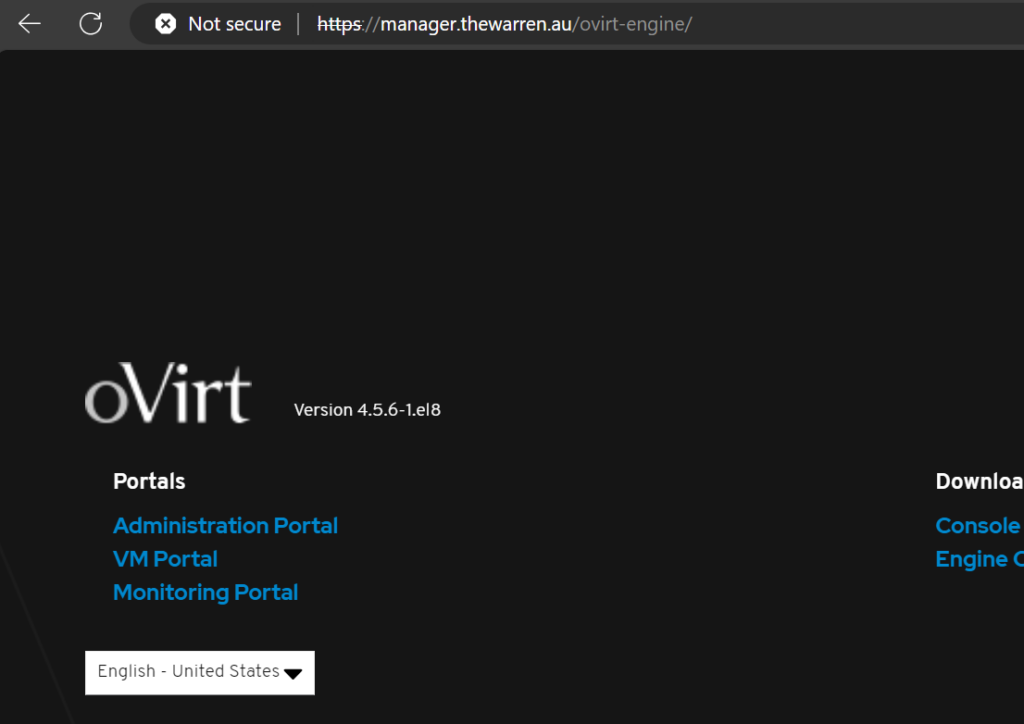
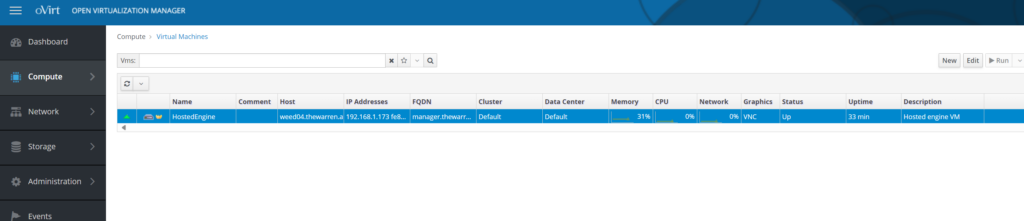
Eventually you will get to the end of the script and you’ll have an operational self-hosted oVirt Engine running on your oVirt node.
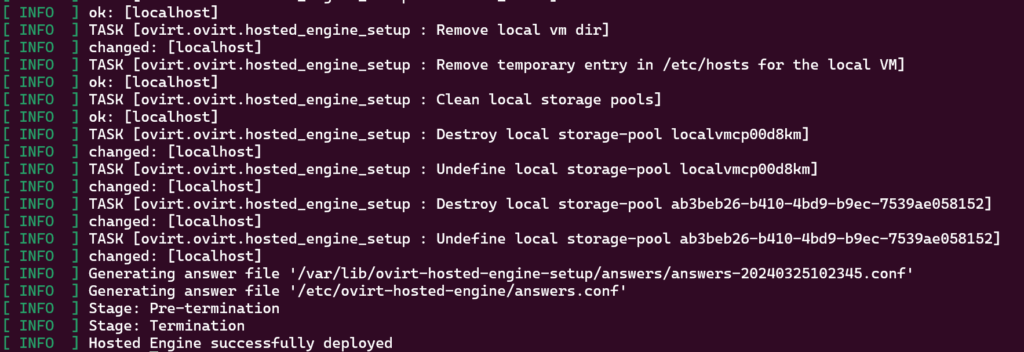
Voila!